


By FlashSoftFix | Mobile Phone Hardware Repair & Chip-Level Troubleshooting
Mobile motherboard repair requires more than just a soldering iron and hot-air machine. Accurate diagnosis, controlled heating, microscopic inspection and proper testing are all important when working with modern smartphone PCBs.
Over time, I have built my repair workstation around the tools that I actually use for motherboard-level troubleshooting, micro-soldering, IC work, CPU reballing and fault diagnosis.
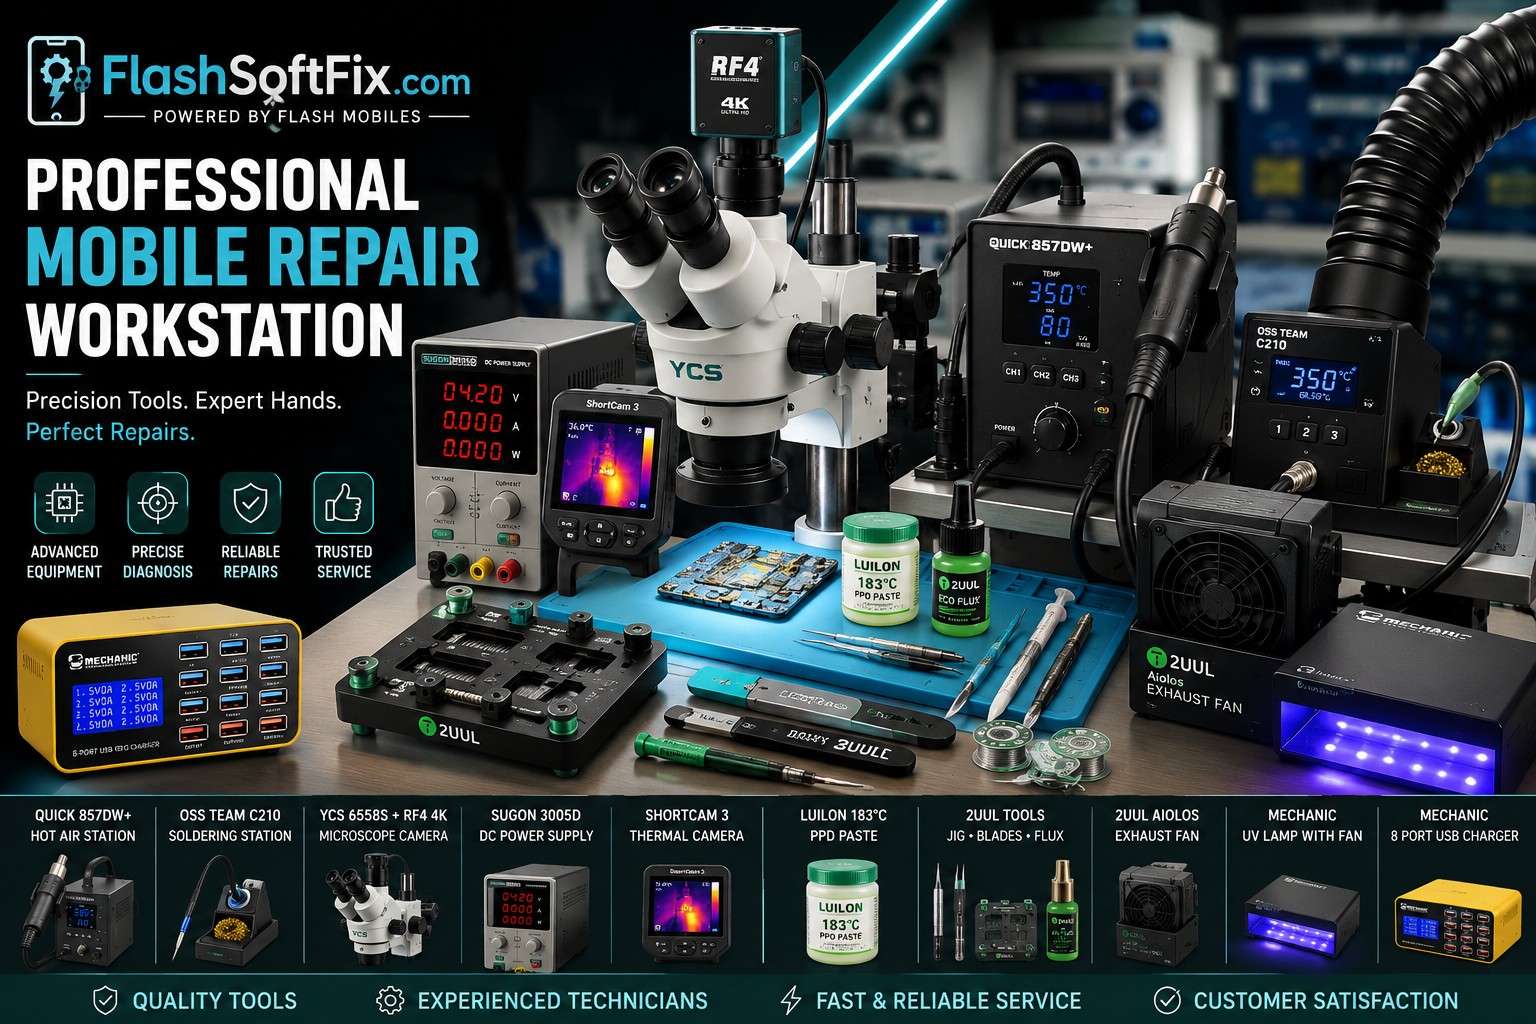
This article documents my actual mobile phone repair bench at FlashSoftFix.
My Mobile Repair Station Equipment
1. QUICK 857DW+ Hot-Air Rework Station

The QUICK 857DW+ is one of the main tools on my repair bench.
I use the hot-air station for motherboard rework such as:
- IC removal
- IC refitting
- SMD component replacement
- Connector and shield work
- Solder reflow/rework
- BGA-related motherboard work
Controlled airflow and temperature are especially important when working around densely populated smartphone PCBs.
Hot-air rework is a fundamental part of board-level phone repair because it allows multiple solder joints underneath or around a component to be heated simultaneously.
Also Check: Best Hot Air Rework Stations for Mobile Repair in 2026
2. OSS TEAM C210 Soldering Station

For precision soldering and micro-jumper work, I use the OSS TEAM C210 soldering station.
This is used for jobs where hot air is not appropriate, including:
- Jumper wire repair
- PCB pad repair
- Small SMD components
- Fine soldering
- Track restoration
- Connector-related work
- Micro-soldering
A good soldering station is particularly important when repairing damaged PCB pads and very small components.
Also Check: Best Soldering Stations for Mobile Repairing in 2026
3. YCS 6558S Microscope +


For motherboard repair, the microscope is one of the most important pieces of equipment on my bench.
My setup uses a YCS 6558S microscope with an RF4 4K Ultra HD camera.
I use the microscope for:
- PCB inspection
- Finding damaged tracks
- Checking solder joints
- Inspecting IC pads
- Jumper-wire work
- Component identification
- CPU/IC reballing inspection
- Post-repair inspection
The camera also allows me to capture high-resolution views of repair work for documentation and educational content.
A microscope is particularly valuable for modern smartphone motherboard work because many components and solder joints are too small to inspect reliably with the naked eye.
4. Sugon 3005D DC Power Supply

The Sugon 3005D DC power supply is an important diagnostic tool on my workstation.
I use the DC supply to observe motherboard current consumption during troubleshooting.
Current consumption can provide useful clues about the condition of a phone before performing major board-level work. A bench power supply is commonly used in motherboard diagnosis to observe abnormal current draw and help narrow down possible faults.
For example, depending on the fault, the current behaviour can help me distinguish between different types of problems such as:
- Short-circuit conditions
- Power-sequence problems
- No-power faults
- Boot-related faults
- Abnormal motherboard activity
I always interpret current readings together with other diagnostic observations rather than relying on one reading alone.
5. ShortCam 3 Thermal Camera

The ShortCam 3 thermal camera is another important diagnostic instrument in my setup.
Thermal imaging is extremely useful when searching for abnormal heating on a motherboard.
When a board has a suspected short or a component is drawing abnormal current, thermal imaging can help locate the area producing excess heat.
My workflow can therefore combine:
DC Power Supply → Current Observation → Thermal Imaging → Microscope Inspection → Component-Level Repair
Thermal cameras are widely used in board repair because heat signatures can help identify abnormal components during powered testing.
CPU Reballing Equipment
6. Liulon 183°C PPD Paste

For CPU/BGA reballing work, I use Liulon 183°C PPD paste.
CPU reballing requires careful preparation of the IC, correct solder-ball formation and controlled reinstallation.
I use the paste as part of my CPU reballing process when the particular repair requires it.
7. 2UUL PCB Holder The One Jig

The 2UUL PCB Holder The One Jig helps keep the motherboard securely positioned during repair.
A stable PCB is particularly important when:
- Soldering jumpers
- Removing components
- Installing components
- Inspecting pads
- Working under the microscope
- Performing precision board-level repairs
Keeping the board stable reduces unnecessary movement during delicate work.
8. 2UUL S.e.x.y Blade

For IC removal and motherboard work, I also use the 2UUL S.e.x.y Blade.
It is one of the specialized hand tools in my repair setup and is useful when carefully working around ICs during board-level repair.
Flux and Rework Materials
9. Halogen-Free ECO Flux

I use halogen-free ECO flux during soldering and motherboard rework.
Flux helps improve solder wetting and makes controlled soldering work easier, particularly during fine component and jumper repairs.
Choosing suitable flux is important because smartphone PCBs contain very small pads, tracks and components where controlled solder flow matters.
Fume Extraction
10. 2UUL Exhaust Fan

Motherboard repair involves soldering, flux and heating operations, so proper fume extraction is important at the workstation.
I use a 2UUL exhaust fan to help remove fumes from the immediate repair area.
A clean and properly ventilated workstation is an important part of maintaining a comfortable repair environment.
UV Curing
11. Mechanic UV Lamp with Fan

I also use a Mechanic UV lamp with fan in my workstation.
The UV lamp is useful for repair processes involving UV-curable materials, while the fan helps with cooling during operation.
USB Charging / Power Testing
12. Mechanic 8-Port Fast-Charging USB Charger

For charging and power-related testing, I use a Mechanic 8-port fast-charging USB charger.
Having multiple charging ports available is useful when working with several devices during testing and repair.
How I Use These Tools Together
The important thing about a professional repair station is not simply owning expensive equipment. The real advantage comes from using the tools together as a diagnostic workflow.
A typical motherboard investigation can follow a process like:
1. Visual inspection
↓
2. DC power supply testing
↓
3. Observe current consumption
↓
4. Thermal-camera inspection when required
↓
5. Microscope inspection
↓
6. Identify the suspected component/area
↓
7. Hot-air or precision soldering work
↓
8. Jumper/pad/track repair when necessary
↓
9. Reballing or IC refitting when required
↓
10. Final power and functional testing
This combination of electrical measurement, thermal inspection and microscopic examination is a standard approach to board-level troubleshooting.
My FlashSoftFix Repair Bench – Complete Equipment List
| Equipment | Brand / Model | Main Use |
|---|---|---|
| Hot-Air Rework Station | QUICK 857DW+ | IC/SMD rework |
| Soldering Station | OSS TEAM C210 | Micro-soldering |
| Microscope | YCS 6558S | PCB inspection & repair |
| Microscope Camera | RF4 4K Ultra HD | Repair documentation |
| DC Power Supply | Sugon 3005D | Current/power diagnosis |
| Thermal Camera | ShortCam 3 | Heat/short detection |
| CPU Reballing Paste | Luilon 183°C PPD | CPU/BGA reballing |
| PCB Holder | 2UUL PCB Holder Jig | PCB stabilization |
| IC Removal Tool | 2UUL Sexy Blade | IC removal/rework |
| Flux | Halogen-Free ECO Flux | Soldering/rework |
| Exhaust | 2UUL Exhaust Fan | Fume extraction |
| UV Lamp | Mechanic UV Lamp + Fan | UV curing work |
| USB Charger | Mechanic 8-Port Fast Charger | Charging/power testing |
Conclusion
My repair station is built around three important areas:
🔬 Accurate inspection — YCS microscope + RF4 4K camera
⚡ Electrical diagnosis — Sugon 3005D + ShortCam 3
🔥 Precision rework — QUICK 857DW+ + OSS TEAM C210
Together, these tools allow me to approach smartphone motherboard problems systematically instead of simply replacing components and hoping for a result.
At FlashSoftFix, my focus is on diagnosis first, repair second — understanding what is happening on the motherboard before performing the actual repair.
Tools don’t repair the motherboard by themselves. Proper diagnosis, experience and controlled repair technique do.

